Making kombucha only requires a few ingredients: tea, sugar, water, and a SCOBY (Symbiotic Culture of Bacteria and Yeast). Here’s how to get started:
Step 1: Brew the Sweet Tea
Start by brewing a batch of sweet tea using black or green tea and about a cup of sugar per gallon. Adding sugar to kombucha may sound counterintuitive, but it’s essential for the fermentation process. Here’s why:
When you brew kombucha, the sugar isn't added for sweetness—it’s there to feed the SCOBY. The SCOBY needs sugar to start fermentation, and it "eats" most of it over time, producing probiotics, organic acids, and a touch of carbonation as a byproduct. This process is what gives kombucha its health benefits.
So, how does the sugar impact the final product? By the end of fermentation, most of the sugar has been consumed by the SCOBY, meaning the kombucha you drink is actually quite low in sugar compared to when you started. You’re left with a naturally tangy, slightly sweet drink that’s rich in probiotics and antioxidants, but low in sugar—making it a great, health-conscious option!
Step 2: Add the SCOBY and Ferment
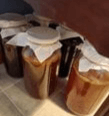
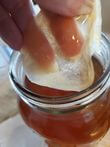
Once your tea has cooled to room temperature, pour it into a large glass jar and add the SCOBY along with a little starter liquid – about 1 cup for a gallon of new kombucha (usually kombucha from a previous batch or unflavored store-bought kombucha). Write the date on a napkin or paper towel and use a rubber band to cover the jar with it. I keep 5 half gallon jars in progress at all times so we have a fresh batch available whenever we need it.
Let it sit at room temperature for 2-3 weeks. The SCOBY will work its magic, feeding on the sugar and transforming the tea into kombucha!

Step 3: Taste Test
After a week or so, start tasting your kombucha. When it’s reached the tangy-sweet balance you like, it’s ready for the next step. I like to ferment mine for 3 weeks – my husband prefers only 2 weeks. That’s why I like to have the date on each jar!
Step 4: Bottle and Flavor (Optional)

This is where you can get creative with flavors! Remove the SCOBY and a cup of the liquid to use for the next batch. Pour your kombucha into airtight bottles. You can add fresh fruit, herbs, or spices for a flavor twist. Here are a few fun ideas:
- Fruit Favorites: Fresh berries, mango chunks, pineapple, or apple slices.
- Herbal Infusions: Mint, basil, or rosemary can add a fresh kick.
- Warm Spice Additions: Add a slice of ginger, cinnamon stick, or even a bit of turmeric for warmth.
- Flavor concentrates: I use a tablespoon of root beer flavoring for mine or strawberry flavoring for my husband, along with about a cup of monkfruit for a half gallon jar.
Step 5: Second Fermentation (Optional)
If you want a fizzier kombucha, leave the flavored bottles at room temperature for another 1–3 days to build up carbonation. Then, pop them in the fridge to slow the fermentation, and they’re ready to enjoy!
Like any new health habit, it’s all about finding what works best for you. If you’re new to kombucha, start with a small glass a few times a week and see how it feels. It’s a simple addition to your routine, and you might just find it’s a refreshing boost that fits in perfectly with your goals to feel your best.
So here’s to us, trying new things, staying curious, and taking small steps to feel fabulous. Cheers, friends!

If you like this content, check out my favorite things in the top right corner.
To read the earlier post, go here


